

Connect over SSH
SSH lets you use the instance from your own terminal and editor. Every instance launched from the console has SSH. You only need to add your public key once.
Add your public key
Section titled “Add your public key”-
If you don’t have a key pair yet, create one. This works on macOS, Linux and Windows PowerShell:
Terminal window ssh-keygen -t ed25519 -C "laptop"It writes the private key to
~/.ssh/id_ed25519and the public key to~/.ssh/id_ed25519.pub. -
Print the public key and copy it:
Terminal window cat ~/.ssh/id_ed25519.pub -
In the console, open Settings and click New SSH key.
-
Enter a Title such as the computer’s name, paste the key into Key, and click New SSH key in the dialog.
The key is listed with its title and fingerprint. You can add one key for each computer you use, up to 10 keys.
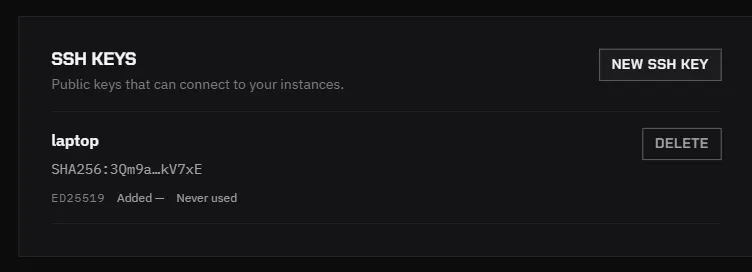
Keys apply to instances launched after you add them. An instance that is already running keeps the keys it started with.
Wait for SSH
Section titled “Wait for SSH”SSH starts a little after the instance, because the platform installs and configures the SSH server when the image doesn’t include one. While it is being set up, the instance card shows Setting up SSH — do not connect yet. JupyterLab already works at this point.
When SSH is ready, the card shows the SSH command.
Connect
Section titled “Connect”Click Copy next to the command on the instance card and run it in your terminal. It has this form:
ssh root@<host> -p <port>You log in as root. The first time you connect, type yes to accept the host key.
If your key isn’t the default one, add -i and the path to the private key.
“Remote host identification has changed”
Section titled ““Remote host identification has changed””A new instance can reuse a host and port that an earlier instance had, with a new host key. If ssh warns that the host key has changed, remove the old entry with the command shown on the instance card, then connect again:
ssh-keygen -R "[<host>]:<port>"SSH could not be set up
Section titled “SSH could not be set up”If the card shows SSH could not be set up, SSH isn’t reachable on this instance, but JupyterLab is unaffected. Work in JupyterLab, or destroy the instance and launch again.
Copy files
Section titled “Copy files”Use scp or rsync with the same host, port and user as the SSH command, for example:
scp -P <port> results.tar.gz root@<host>:/workspace/Connect from the CLI
Section titled “Connect from the CLI”rcc instance ssh connects without copying the command. See Manage GPU instances.